
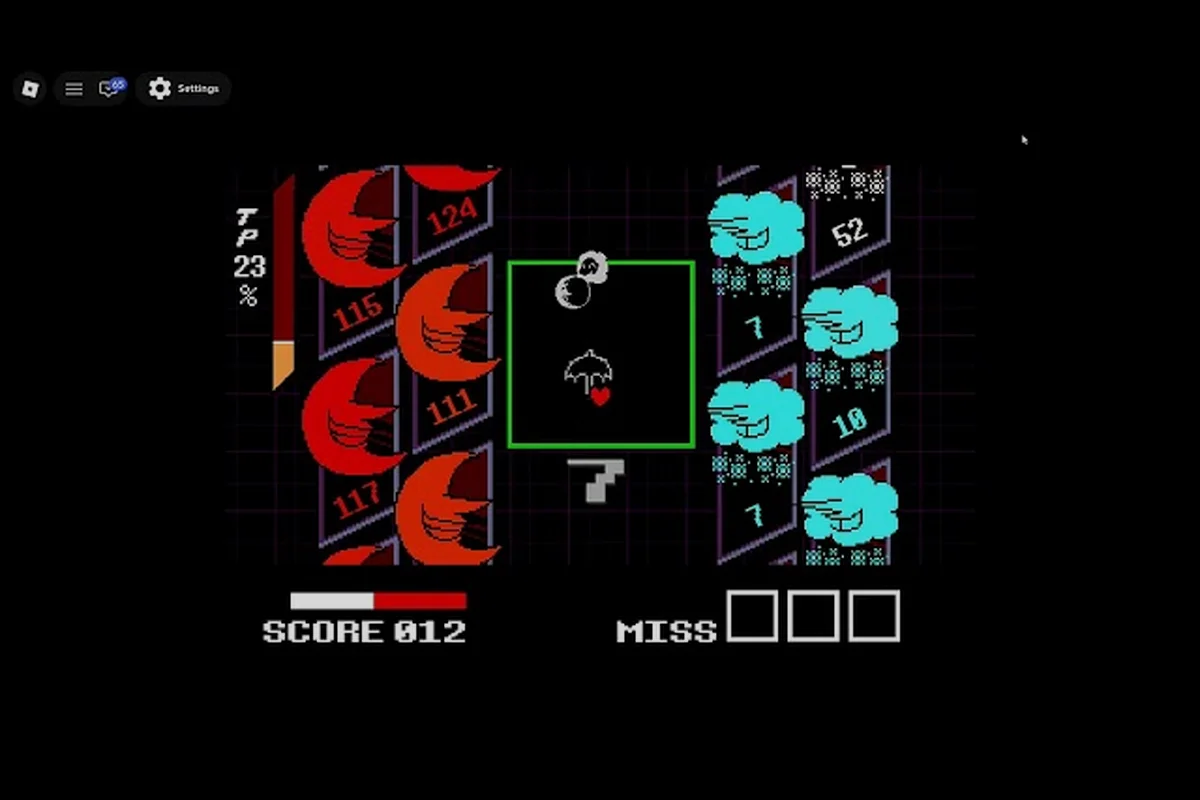
Surviving DELTARUNE Fight on Roblox comes down to one skill above all others: reading the Soul cursor's position before you commit to any attack or dodge. This combat guide breaks down the battle system's rhythm, the Rude Buster timing window, and the parry habits that separate clean clears from frustrating restarts.
Why Soul Placement Drives Every Combat Choice
The Soul is the heart-shaped cursor you steer during every bullet phase, and it is the single most important object on screen because every dodge, parry, and attack window flows from where you place it. According to community videos, the game does not hand you a traditional turn menu with labeled options; instead, you navigate a tight bullet field while managing TP (skill points) to spend on attacks. This means the battle system feels like a hybrid: you are constantly making turn-based decisions about when to spend resources, but you execute those decisions in real time while weaving through projectiles.
The core loop is deceptively simple to describe but punishing to master. You steer the Soul away from incoming bullets, wait for a safe pocket to open, then commit to an attack or reposition. Because the Soul moves continuously rather than snapping to grid positions, small overcorrections compound quickly. Players report that the most common early mistake is treating the Soul like a fast dodge button when it actually rewards short, deliberate adjustments.
What makes this combat guide different from a pure reaction test is the decision layer underneath the execution. You are not just dodging; you are constantly asking whether the current bullet pattern allows a safe attack, whether you should hold TP for a bigger window, or whether the boss is about to enter a high-pressure phase. That mental loop is what the game tests more than raw reflexes.
| Combat Element | What It Demands | Common Player Mistake |
|---|---|---|
| Soul cursor | Short, deliberate steering | Overcorrecting into adjacent bullets |
| TP resource | Saving for safe attack windows | Spending on every opening without checking spacing |
| Rude Buster | Timing the skip window | Firing too early and wasting the charge |
| Bullet phases | Reading patterns before moving | Reacting to individual bullets instead of the sequence |
The confirmed line-up so far includes Tenna, King, Pink, and Kaizo Knight, and each one pressures the Soul in a different way. Tenna tends to layer overlapping bullet sequences, King favors wide, high-damage swings, and Kaizo Knight is reported by players as the hardest tier of execution. Because no official mechanic numbers are published anywhere, every timing habit in this guide is described qualitatively and hedged as a community observation rather than a verified stat.
Why Telegraph Reading Beats Reacting To Bullets
The most reliable way to improve at DELTARUNE Fight is to stop reacting to individual bullets and start reading the sequence as a whole. According to community videos, most boss attacks telegraph their shape well in advance: a wide swing has a long windup, a bullet corridor opens from one side, and an overlapping pattern announces itself before the first projectile arrives. When you learn to recognize those shapes, you can position the Soul in the safe pocket before the danger actually reaches you.
This is where TP discipline becomes the real skill. TP is the resource you spend on attacks, and wasting it on a bad window leaves you without options when a clean opening appears. The better habit is to hold TP through the early part of a bullet phase, survive the dense section with pure movement, then spend when the pattern thins out and the boss is briefly vulnerable. Players report that this hold-then-spend rhythm feels awkward at first but quickly becomes the backbone of consistent clears.
A community recording titled tenna fight in deltarune fight on roblox posted by Dimitar shows exactly this rhythm in action. The recording captures a Tenna encounter where the player spends most of the fight steering through layered projectiles, only committing to attacks during the brief gaps between sequences. Because this is a single community recording rather than an official breakdown, it supports observations about what is visible in that fight, not claims about hidden drop tables or exact scaling rules.
| Pattern Type | What to Watch For | Best Response |
|---|---|---|
| Overlapping bullets | Two or more waves arriving together | Move to the edge of the overlap, not through it |
| Wide swing | Long windup before a broad arc | Position the Soul in the corner pocket early |
| Bullet corridor | A narrow safe lane through projectiles | Commit to the lane and avoid mid-course corrections |
| High-pressure phase | Dense, fast sequences | Hold TP and prioritize survival over damage |
The overlap problem is especially punishing in Tenna's sequences because two bullet waves can arrive at slightly different speeds, creating a moving safe pocket that shifts as you track it. The fix is to watch the origin point of each wave rather than the bullets themselves; the origin tells you where the next wave will spawn, which lets you pre-position instead of reacting late.
Parry Timing and the Rude Buster Window
Parrying in DELTARUNE Fight is less about a dedicated block button and more about positioning the Soul so that an incoming attack either misses entirely or clips a safe edge. Community reports describe the parry habit as a spacing skill: you move into the narrow gap between projectiles, hold your position, and let the attack pass around you. Because the Soul has no visible shield or block animation in the recordings, the safest interpretation is that "parry" here means clean avoidance through precise placement rather than a timed counter.
The Rude Buster attack is the one confirmed community-video attack name, and it matters because players report it can skip the final stretch of a boss phase when timed correctly. The window is not forgiving: fire too early and the attack lands during a dense bullet section, wasting the charge; fire too late and the boss has already recovered. The practical habit is to wait for the moment when the boss finishes a sequence and pauses briefly, then commit the Rude Buster before the next wave spawns.
What makes Rude Buster feel different from a normal attack is the commitment cost. You spend TP to fire it, and if the timing is off, you have lost both the resource and the positioning advantage. That is why experienced players treat it as a finisher rather than an opener: survive the phase with movement, then use Rude Buster to close out the last stretch instead of grinding through another dense bullet wave.
| Timing Habit | What It Looks Like | Why It Works |
|---|---|---|
| Early fire | Attack lands during dense bullets | Wastes TP and leaves you exposed |
| Late fire | Boss has already recovered | Misses the skip window entirely |
| Pause fire | Attack lands right after a sequence ends | Skips the final stretch cleanly |
| Hold fire | Save TP through the whole phase | Keeps options open for a better window |
The parry habit extends to every boss, not just Tenna. King's wide swings create corner pockets where the Soul can sit safely while the arc passes overhead, and Pink's patterns reward staying near the center rather than hugging the edges. The trap of edge-hugging is that it feels safe but actually reduces your escape options when the next wave arrives from the side.
Difficulty Tiers and How They Change the Rhythm
The difficulty tier names Standard, Brutal, and Genocide come from community videos, and each one reshapes the combat rhythm in a specific way. Standard is the default tier where patterns are readable and mistakes are recoverable. Brutal tightens the spacing between bullet waves and shortens the safe pockets, forcing you to commit to movements earlier. Genocide is reported by players as the hardest tier, where the margin for error shrinks to nearly zero and every wasted TP is punished immediately.
The key shift across tiers is not just speed but decision pressure. On Standard, you can afford to react to a pattern after it starts. On Brutal, you need to read the windup and move before the bullets arrive. On Genocide, you need to know the sequence well enough to pre-position during the previous wave, because reacting late means taking a hit. That progression is why this combat guide emphasizes pattern reading over raw reflexes: the higher tiers test your preparation, not your reaction time.
Because no official numbers exist for damage, HP, or cooldowns, the tier differences are best described qualitatively. Players report that Brutal feels like "the same patterns, but with less room to breathe," while Genocide feels like "the patterns overlap in ways that force you to memorize safe lanes." Those descriptions are community observations, not verified stats, and they may shift as the September 2026 build evolves.
| Difficulty Tier | What Changes | Required Habit |
|---|---|---|
| Standard | Readable patterns, recoverable mistakes | Learn the basic rhythm |
| Brutal | Tighter spacing, shorter safe pockets | Read windups before moving |
| Genocide | Near-zero margin, overlapping sequences | Memorize safe lanes and pre-position |
The overlap between tiers is where most players plateau. You can clear Standard with reactive dodging, but Brutal punishes that habit because the safe pockets close before you can react. The transition requires unlearning the reactive style and replacing it with a predictive one: watch the origin point, anticipate the next wave, and move before the danger materializes.
Building a Repeatable Combat Routine
Consistency in DELTARUNE Fight comes from building a repeatable routine that works across every boss, not from memorizing a single fight. The routine has three parts: read the windup, hold TP through the dense section, and commit during the pause. When you apply that loop to Tenna, King, Pink, and Kaizo Knight, the fights start to feel like variations on the same rhythm rather than separate challenges.
The first part, reading the windup, means watching the boss's movement before the bullets spawn. Every confirmed boss telegraphs its attacks in some way, and the earlier you recognize the telegraph, the more time you have to position the Soul. The second part, holding TP, is the discipline that separates clean clears from messy ones: survive the dense section with movement alone, then spend when the pattern thins. The third part, committing during the pause, is where Rude Buster and other attacks actually land.
This routine also connects to the broader question of how to fight effectively in DELTARUNE Fight. The answer is not a specific button sequence but a decision rhythm: observe, survive, commit, repeat. Players who internalize that rhythm report faster clears and fewer restarts, even on the harder tiers, because they stop wasting resources on bad windows.
For a deeper look at how to handle specific boss patterns, the boss dodge guide walks through Tenna, King, and Pink encounters with pattern-by-pattern breakdowns. That guide complements this combat guide by focusing on the execution side, while this article covers the decision layer underneath.
| Routine Step | What to Do | Common Failure |
|---|---|---|
| Read the windup | Watch the boss before bullets spawn | Reacting after bullets appear |
| Hold TP | Survive dense sections with movement | Spending on every opening |
| Commit during pause | Fire attacks when the pattern thins | Firing during dense waves |
| Repeat | Apply the loop to every boss | Treating each fight as unique |
The routine also helps with the all attacks question that players often ask about. Because the game publishes no official attack list, the confirmed attack names come from community videos, and Rude Buster is the only one with a clear community-video label. Other attacks are visible in recordings but not consistently named, so the safest approach is to learn the patterns rather than chase a complete attack catalog.
How Parry Habits Carry Across Every Boss
The parry habits you build on one boss transfer directly to the others because the underlying spacing principles are the same. King's wide swings teach you to find corner pockets, Tenna's overlapping bullets teach you to read origin points, and Pink's patterns teach you to stay near the center instead of hugging edges. Each boss isolates a different spacing skill, and together they form a complete movement toolkit.
Kaizo Knight is reported by players as the hardest execution check because it combines multiple spacing demands at once: wide swings, overlapping bullets, and tight safe pockets all appear in the same fight. The only way through is to have each individual habit already internalized so you can switch between them without thinking. That is why practicing on the earlier bosses matters: they are not just obstacles but training grounds for the skills Kaizo Knight demands.
The controller question also matters here because input precision affects how cleanly you can steer the Soul. The controller support guide covers how different input methods change the feel of movement, which is especially relevant when you are trying to make the small, deliberate adjustments that parrying requires.
| Boss | Primary Spacing Skill | Transferable Habit |
|---|---|---|
| Tenna | Reading overlapping origins | Pre-position before waves arrive |
| King | Finding corner pockets | Move early, not reactively |
| Pink | Staying near center | Avoid edge-hugging traps |
| Kaizo Knight | Combining all spacing skills | Switch habits without thinking |
The transfer works in both directions. A habit you build on Tenna's overlapping bullets will help you read Kaizo Knight's denser sequences, and a habit you build on King's wide swings will help you find safe pockets in Pink's patterns. The game rewards treating the confirmed line-up as a single curriculum rather than four separate tests.
Frequently Asked Questions
What is the best way to learn the DELTARUNE Fight battle system?
Start on Standard difficulty and focus on reading bullet patterns before you spend TP. The battle system rewards predictive positioning over reactive dodging, so practice holding TP through dense sections and committing only during safe pauses. Community videos show this hold-then-spend rhythm as the foundation of consistent clears.
How do you dodge effectively in DELTARUNE Fight?
Watch the origin point of each bullet wave rather than the individual projectiles. The origin tells you where the next wave will spawn, which lets you pre-position the Soul before danger arrives. Short, deliberate adjustments work better than fast overcorrections, especially on Brutal and Genocide tiers where safe pockets close quickly.
How does parrying work in DELTARUNE Fight?
Parrying is best understood as precise spacing rather than a timed counter. You move the Soul into the narrow gap between projectiles, hold your position, and let the attack pass around you. Community recordings show no dedicated block animation, so the skill is clean avoidance through careful placement.
When should I use Rude Buster?
Use Rude Buster as a finisher, not an opener. Wait for the moment when a boss finishes a sequence and pauses briefly, then commit the attack before the next wave spawns. Firing too early wastes TP during dense bullets, while firing too late misses the skip window entirely.
What are all the attacks in DELTARUNE Fight?
The game publishes no official attack list, so confirmed attack names come from community videos. Rude Buster is the only attack with a clear community-video label, while other attacks appear in recordings without consistent names. The practical approach is to learn the patterns rather than chase a complete catalog.
The combat system in DELTARUNE Fight rewards players who treat every fight as a decision rhythm: read the windup, hold TP through the dense section, and commit during the pause. Once that loop becomes automatic, the confirmed bosses stop feeling like separate walls and start feeling like variations on the same spacing challenge.