
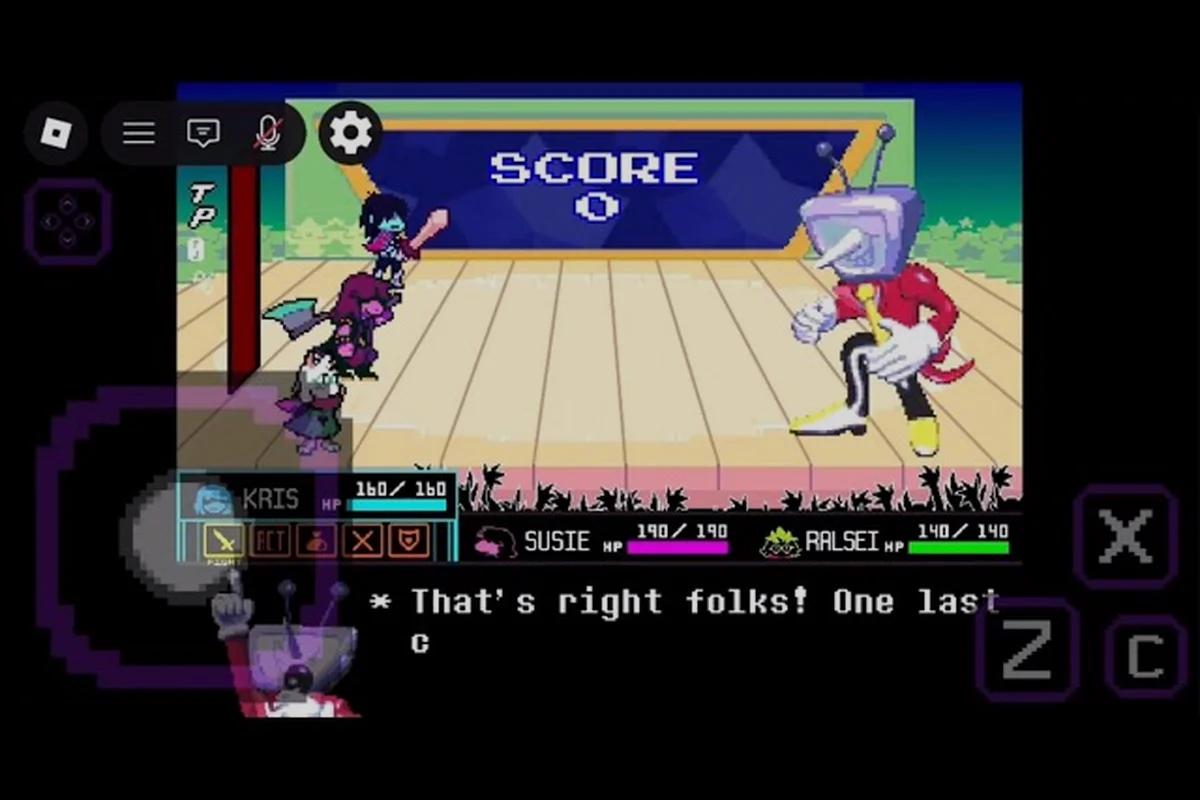
Surviving a boss rush in DELTARUNE Fight comes down to three linked skills: landing meaningful damage, reading bullet patterns before they reach you, and knowing exactly when to spend a turn on healing instead of attacking. Most failed runs collapse not because a player lacks reflexes, but because they burn TP at the wrong moment or drift into a bullet cluster that was telegraphed seconds earlier. This DELTARUNE Fight attack guide breaks down how those systems interact so you can push deeper into the confirmed boss line-up without relying on guesswork.
How the Soul Cursor Shapes Every Attack Decision
Every offensive and defensive choice in DELTARUNE Fight flows through the Soul — the heart-shaped cursor you steer during bullet phases. The Soul is not just a dodge tool; it is the anchor point for reading where damage will land, when a boss is about to shift its pattern, and whether you have enough space to commit to an attack input. Players who treat the Soul as a passive hitbox tend to drift into corners, while players who treat it as an active positioning tool can hold safer lanes through long bullet sequences.
The core loop is deceptively simple. You spend TP to launch attacks, then you steer the Soul through the boss's response pattern, then you decide whether to attack again or heal. The difficulty is that every boss in the confirmed line-up — Tenna, King, Pink, and Kaizo Knight — pressures that loop differently. Some bosses punish aggressive TP spending by flooding the screen immediately after your input, while others leave a short recovery window that rewards a quick follow-up. Learning which boss does which is the foundation of consistent damage output.
Steering the Soul Through Tight Bullet Corridors
The most common mistake in DELTARUNE Fight bullet hell sections is overcorrecting. When a dense wave approaches, newer players jerk the Soul across the full arena, which often carries them into a second wave that was already traveling along the edge. According to community videos, the safer habit is to make small, deliberate adjustments and keep the Soul near the center of the screen, where bullet clusters tend to spread out and leave wider gaps.
A useful mental model is to treat the Soul's position as a commitment. Once you move into a lane, you are signaling to yourself where the next safe pocket will be. If you constantly reverse direction, you create a zigzag path that intersects more bullets than a straight retreat would. The confirmed boss fights reward players who can hold a lane for a beat, read the next gap, and then move once with intent.
Why Movement Discipline Beats Raw Reaction Speed
Reaction speed matters less than movement discipline in this game because most bullet patterns are designed to punish panic. A wide, high-damage swing from King is telegraphed well in advance, which means the correct response is not to dodge at the last possible frame but to already be standing in the safe zone when the swing arrives. Players who wait to react often find that the safe zone has closed by the time they process the visual cue.
This is why experienced players describe DELTARUNE Fight combat as turn-based even during the real-time bullet phases. The boss takes a turn by launching a pattern, you take a turn by repositioning the Soul, and then you either counterattack or wait. Framing it this way removes the pressure to be constantly moving and replaces it with a rhythm of read, move, confirm, repeat.
Reading Bullet Patterns Before You Spend TP
Understanding deltarune fight bullet patterns is the single highest-leverage skill you can build, because every TP you spend triggers a response. If you attack without knowing what the boss is about to do, you are gambling. If you attack while already reading the next pattern, you are trading. The difference shows up most clearly in the harder difficulty tiers, where a mistimed attack can cascade into a full-screen bullet wall.
The confirmed bosses each have a visual language that precedes their attacks. Tenna tends to layer overlapping sequences that force you to track multiple threat sources at once, while King favors wide, high-damage swings that leave a clear safe pocket if you read the windup. Pink and Kaizo Knight add their own pressure, but the underlying principle stays the same: every pattern has a tell, and every tell has a correct response.
The Overlap Problem in Tenna's Bullet Sequences
A community recording titled Roblox DELTARUNE Fight - Tenna Boss Brutal/Genocide (Full Fight) posted by Sevv shows how quickly Tenna's patterns can stack. The recording captures the boss launching multiple bullet types in sequence, which means the player has to track a wave that is still resolving while a new one is already spawning. This is the core challenge of the Tenna encounter: you are rarely dealing with one clean pattern at a time.
The practical takeaway from that recording is that Tenna rewards players who can identify which bullet type is the immediate threat and which one can be ignored for a beat. Not every bullet on screen requires a reaction. Some are traveling along paths that will not intersect your current lane, and reacting to them anyway is what pulls you into danger. Reading the overlap means filtering the screen down to the two or three bullets that actually matter.
King's Wide Swing Windows and Safe Pockets
King presents a different kind of challenge. Where Tenna overwhelms with density, King punishes with reach. His wide, high-damage swings cover a large portion of the arena, but they are telegraphed well in advance, which means the safe pocket is usually visible before the swing starts. The skill is trusting that read and moving early instead of waiting to confirm the swing's path.
Players who struggle with King tend to stand in the middle of the arena, where his swings overlap and the safe pockets are narrowest. Hugging the edges can help, but only if you know which edge is safe for the current pattern. According to community reports, the most consistent approach is to watch King's windup direction and move perpendicular to it, which keeps you out of the swing's arc while leaving room to counterattack.
| Boss | Primary Pressure Style | What the Phase Demands | Helpful Habit |
|---|---|---|---|
| Tenna | Overlapping bullet sequences | Tracking multiple threat sources | Filter the screen to immediate threats |
| King | Wide, high-damage swings | Reading windup direction early | Move perpendicular to the swing arc |
| Pink | Mixed pressure with shifting lanes | Adapting position mid-pattern | Hold a lane, then commit to one move |
| Kaizo Knight | High-pressure phase with tight gaps | Precise Soul placement | Make small adjustments near center |
How to Deal More Damage Without Wasting TP
The question of deltarune fight how to deal more damage is really a question of TP efficiency. Every attack costs TP, and TP does not regenerate fast enough to spend recklessly. The players who clear bosses consistently are not the ones who attack the most; they are the ones who attack at the moments when the boss is most vulnerable and the response pattern is most predictable.
Rude Buster is the community-video attack name that comes up most often in damage discussions. According to community videos, Rude Buster can be used to skip a final phase segment, which makes it a powerful tool when timed correctly. The key is not to fire it the moment you have enough TP, but to hold it until the boss is entering a phase where skipping part of the sequence saves you more pressure than the TP cost.
Building a Repeatable Damage Rotation
A repeatable rotation in DELTARUNE Fight looks less like a fixed combo and more like a decision tree. You attack when the boss is in a recovery window, you reposition during the response pattern, and you heal only when the next pattern is one you can survive with reduced tempo. The rotation repeats, but the specifics change based on which boss you are fighting and which difficulty tier you selected.
The Standard, Brutal, and Genocide difficulty tiers reshape this rotation by changing how much pressure each response pattern applies. On Standard, you can afford to attack more aggressively because the bullet density is lower. On Brutal and Genocide, the same attack triggers a denser response, which means you need to be more selective about when you spend TP. The hardest tier punishes every wasted input.
Timing Rude Buster for Maximum Value
The highest-value Rude Buster timing is the one that cancels the most dangerous part of a boss's sequence. If a boss has a phase where the bullet density spikes and the safe pockets shrink, firing Rude Buster just before that phase can skip it entirely. This is a qualitative read, not a numeric one — you are looking for the moment when the screen is about to become unmanageable, and you are spending TP to prevent that moment from arriving.
The risk is firing Rude Buster too early, when the boss still has a manageable pattern active. That wastes the skip potential and leaves you with less TP for the actual pressure spike. According to community videos, the best Rude Buster users hold the attack until the boss's windup for a high-pressure phase is already visible, then fire to interrupt it before the bullets spawn.
| Timing Habit | What It Does | Risk |
|---|---|---|
| Fire immediately on TP available | Maximizes attack count | Triggers dense response with no read |
| Hold for visible phase transition | Skips high-pressure segment | Requires reading the transition cue |
| Fire during recovery window | Safe damage with predictable response | Lower skip value |
| Save for final phase | Highest skip potential | Risk of dying before using it |
Dodging Tips for Bullet Hell Survival
Deltarune fight dodging tips all circle back to the same core idea: the safest place on screen is usually not where the fewest bullets are, but where the bullets are moving in the most predictable direction. A corner might look empty for a moment, but corners are where multiple bullet paths converge, which means they become death traps a second later. The center of the arena, by contrast, gives you more directions to escape.
The Soul's movement speed is generous enough that you rarely need to be in the perfect spot. You need to be in a spot that gives you options. When you hug a wall, you cut your escape directions in half. When you stay near the center, you can respond to any pattern with a short move in any direction. This is why experienced players describe the center as the default safe zone, even though it sometimes looks more crowded.
The Trap of Edge-Hugging
Edge-hugging feels safe because it puts distance between you and the boss, but distance is not the same as safety in a bullet hell. Bullets that spawn near the boss travel outward, which means the edges are where they arrive last — and where they are most concentrated. A player standing at the edge has already committed to a position with fewer escape routes, and when the wave arrives, they have to thread a gap that is narrower than anything in the center.
The better habit is to use the edges only as a temporary retreat, not a home base. Move to the edge when a specific pattern pushes you there, then return to the center as soon as the wave passes. This keeps your options open and prevents the slow drift toward a corner that ends so many runs.
Reading the Safe Pocket Before It Opens
The best dodgers in DELTARUNE Fight are not reacting to bullets that are already close; they are reading where the safe pocket will be before it opens. This means watching the spawn points and the travel directions of incoming bullets, then moving to the gap that is about to form rather than the gap that already exists. It is a subtle shift, but it changes dodging from a reaction game into a planning game.
A practical way to build this skill is to focus on one bullet type at a time during practice runs. Watch how a specific pattern spawns, how it travels, and where the gaps appear. Once you can predict that pattern's safe pocket, you can layer the next pattern on top. Over time, you build a mental library of pattern reads that makes the overlapping sequences feel manageable instead of overwhelming.
| Dodging Habit | Why It Helps | Common Mistake |
|---|---|---|
| Stay near center | More escape directions | Drifting to corners |
| Move once with intent | Avoids zigzag intersections | Constant small corrections |
| Read the next gap | Arrive before the pocket closes | Reacting to close bullets |
| Use edges as temporary retreat | Keeps options open | Treating edges as home base |
How to Heal at the Right Moment
The question of deltarune fight how to heal is really a question of opportunity cost. Every turn you spend healing is a turn you are not spending on damage, which means the boss lives longer and launches more patterns. Healing too early wastes tempo; healing too late risks death. The sweet spot is healing when the next pattern is survivable at reduced tempo and the boss is not in a vulnerable window you should be exploiting.
The turn-based structure of DELTARUNE Fight makes this decision more legible than it is in pure action games. You can see the boss's current pattern, you can see your own health state, and you can make a deliberate choice about whether to heal or attack. The trap is treating healing as an emergency button instead of a planned resource. Players who heal reactively tend to heal at the worst possible moments, right as a dense wave is spawning.
Healing as a Planned Resource
The best heal timing is the one you choose before you need it. When a boss enters a phase you know well, and you can see that your health is low enough that the next hit will end the run, that is the moment to heal — not when you are already at critical health and the screen is full of bullets. Healing early, while the pattern is still readable, gives you the tempo to survive the next sequence.
This is especially important on Brutal and Genocide, where the margin for error is smaller. On those tiers, a single mistimed heal can cascade into a death because the boss's response pattern is denser and the safe pockets are tighter. Planning your heal around a known safe window is the difference between a clean recovery and a panic spiral.
When to Skip Healing and Push Damage
There are moments when healing is the wrong choice even at low health. If the boss is in a vulnerable window and you have enough TP for a high-value attack, pushing damage can end the phase before the next pattern arrives. This is a gamble, but it is a calculated one: you are trading the safety of a heal for the chance to skip an entire sequence.
The key is knowing which bosses reward this trade. Bosses with long recovery windows give you room to attack and then heal on the following turn. Bosses with short windows punish the greed. According to community reports, the safest approach is to push damage only when you can see the phase is about to end, and to heal when the phase still has a long stretch remaining.
Turn-Based Combat Logic in a Real-Time Shell
Deltarune fight turn based combat is a useful frame for understanding why the game feels different from a pure bullet hell. The boss and the player alternate pressure: the boss launches a pattern, the player responds, and then the player either attacks or heals. The real-time movement is the execution layer, but the decision layer is turn-based.
This framing helps because it removes the pressure to be constantly active. You do not need to be moving every frame; you need to be making the right decision at each turn boundary. When the boss is launching a pattern, your turn is to reposition. When the pattern resolves, your turn is to attack or heal. When you internalize this rhythm, the game slows down even though the bullets do not. When you internalize this rhythm, the game slows down even though the bullets do not—and once you’ve mastered turn-boundary timing, you can start converting those safe attack windows into Deltarune Fight Critical Hits by timing your confirms to the same rhythm.
The Decision Layer Versus the Execution Layer
The decision layer is where most runs are won or lost. You can have perfect execution and still die if you make the wrong decision about when to spend TP or heal. Conversely, a player with average execution can clear bosses consistently if their decisions are sound. This is why the best players describe DELTARUNE Fight as a thinking game that happens to have bullets.
The execution layer is still important — you need to steer the Soul through tight gaps and hit your attack inputs — but execution is the easier skill to build. Decision-making is harder because it requires reading the boss's state, your own resources, and the next likely pattern all at once. The players who improve fastest are the ones who focus on decisions first and let execution follow.
Applying the Turn-Based Frame to Every Boss
Each confirmed boss tests a different part of the turn-based frame. Tenna tests your ability to read overlapping patterns during the boss's turn. King tests your ability to commit to a safe position before the swing arrives. Pink tests your adaptability when the pattern shifts mid-sequence. Kaizo Knight tests your precision under the highest pressure. The frame stays the same; the emphasis shifts.
This is why a single attack guide can cover all four bosses without becoming a boss-specific walkthrough. The underlying skills — reading patterns, managing TP, timing heals, and positioning the Soul — transfer across every encounter. What changes is which skill each boss demands most, and that is something you learn by fighting them.
Frequently Asked Questions
What is the best way to deal more damage in DELTARUNE Fight?
The best way to deal more damage is to improve TP efficiency rather than attack count. Hold Rude Buster for phase transitions where it can skip a high-pressure segment, and attack during recovery windows when the boss's response pattern is most predictable. Wasting TP on low-value attacks triggers denser responses without meaningful progress.
How do I read bullet patterns in the harder difficulty tiers?
Focus on one bullet type at a time during practice runs until you can predict its safe pocket before it opens. On Brutal and Genocide, the same patterns spawn denser responses, but the underlying tells stay consistent. Filter the screen down to the two or three bullets that actually threaten your current lane instead of reacting to everything.
When should I heal instead of attacking?
Heal when your health is low enough that the next hit ends the run and the current pattern is still readable. Avoid healing reactively during a dense wave, because the heal animation locks you into a vulnerable position. If the boss is in a vulnerable window and the phase is about to end, pushing damage is often the better trade.
Does DELTARUNE Fight have true turn-based combat?
The decision layer is turn-based even though the execution layer is real-time. The boss launches a pattern, you reposition the Soul, and then you choose to attack or heal. Framing the game this way removes the pressure to be constantly moving and replaces it with a rhythm of read, move, confirm, repeat.
Which boss is the hardest to dodge?
According to community videos, Tenna's overlapping bullet sequences are the hardest to dodge because you are tracking multiple threat sources at once. King's wide swings are telegraphed earlier but cover more space, while Kaizo Knight demands the tightest Soul placement under the highest pressure.