
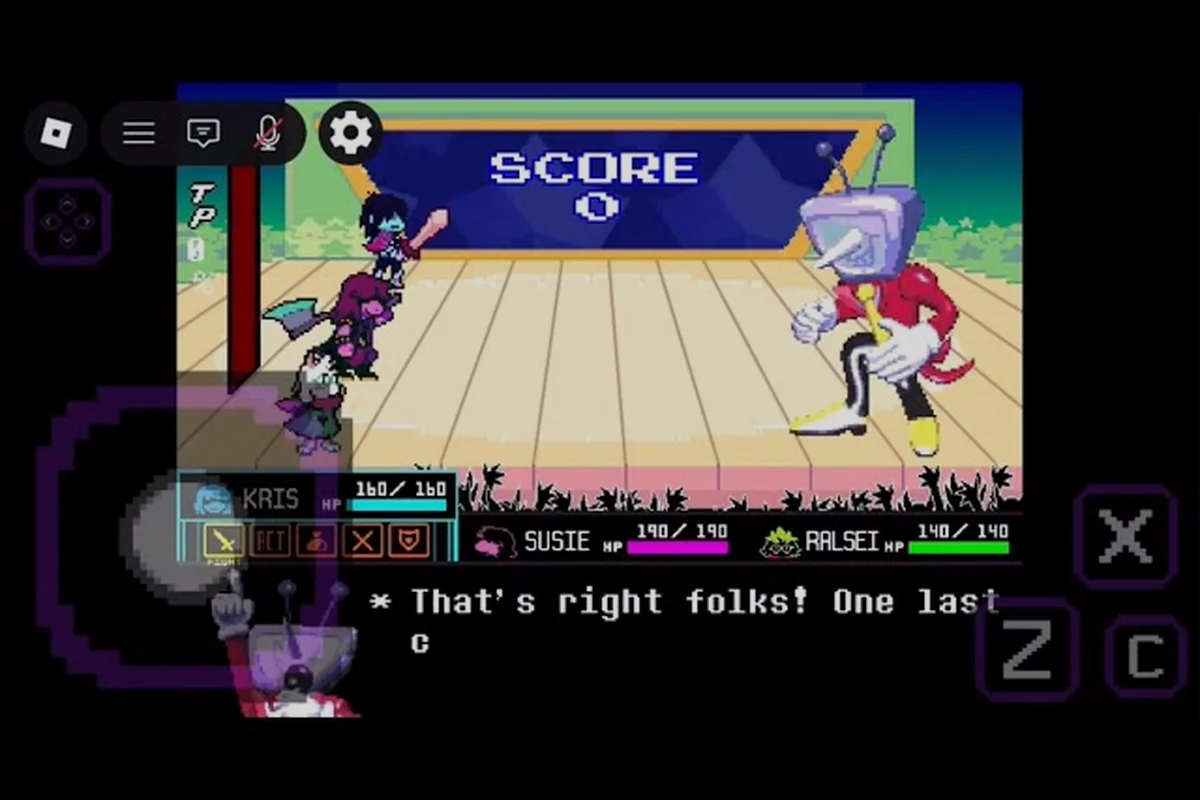
Learning how to dodge boss attacks in DELTARUNE Fight comes down to one skill: reading the soul cursor before the bullet pattern locks in. Most failed runs happen because players react to the projectile instead of the telegraph, which leaves the soul trapped in a corner during the dense closing phase. This guide breaks down the timing rules, safe-spot reads, and counter windows that keep the soul alive against the confirmed boss line-up.
Why the Soul Cursor Is Your Real Health Bar
The soul cursor is the heart-shaped object you steer during every bullet phase, and it is the only thing that actually matters when a boss starts firing. According to community videos, players who treat the soul as a positioning tool rather than a reaction tool survive noticeably longer, because every attack in DELTARUNE Fight is designed to punish panic movement before it punishes slow movement. The core habit is to keep the soul near the center of the arena unless a specific pattern forces you to the edge, since the center gives you the shortest escape distance in every direction.
When you watch a community recording titled Roblox DELTARUNE Fight - Tenna Boss Brutal/Genocide (Full Fight) posted by Sevv, the uploader repeatedly loses the soul cursor during the dense closing phase because they drift toward the bottom edge too early. That edge position feels safe in the moment, but it removes half of your available escape routes and makes the next volley nearly undodgeable. The lesson from that recording is not about memorizing a specific pattern; it is about recognizing when your soul position has already lost the fight before the bullet arrives.
| Soul Position Habit | What It Does | When It Fails |
|---|---|---|
| Center hold | Keeps every escape route open | Dense radial bursts can still clip you |
| Edge hugging | Feels safe but halves your options | Tracking volleys and corner traps |
| Drifting downward | Common panic response | Closing phases with low clearance |
| Micro-tapping | Small corrections preserve control | Overcorrection when a fast volley starts |
The soul cursor also interacts with the game's difficulty tiers in a way that changes your dodge priorities. On Standard, the patterns leave generous gaps and the soul feels forgiving, which makes it the right place to practice center-hold discipline. On Brutal and Genocide, those same gaps shrink and the boss layers patterns on top of each other, so the soul has to move earlier and commit to a direction before the telegraph finishes. Players report that the jump from Standard to Brutal is less about learning new attacks and more about unlearning the habit of waiting to see the bullet.
Reading Telegraphs Before the Bullet Pattern Locks
Every confirmed boss in DELTARUNE Fight signals an attack before the projectiles spawn, and the dodge window starts during that signal, not after the bullet appears. The telegraph is usually a shift in the boss's posture, a flash, or a change in the arena layout, and the soul should already be moving toward the safe zone when that signal resolves. Players who wait for the first projectile to leave the boss are already behind the pattern, which is why the same attack can feel impossible on Brutal but manageable on Standard.
The most reliable way to build this read is to separate each fight into pattern families rather than individual attacks. A wide swing, a tracking volley, and a radial burst all demand different soul movements, but they share telegraphs that you can learn once and apply across multiple bosses. The table below groups the common pattern families reported by players and the soul response that works best for each one.
| Pattern Family | Typical Telegraph | Soul Response | Common Mistake |
|---|---|---|---|
| Wide swing | Boss winds up to one side | Move to the opposite edge early | Dodging into the swing arc |
| Tracking volley | Boss locks onto your position | Keep moving, never stop | Stopping to assess the spread |
| Radial burst | Center flash or ring indicator | Hold center, micro-tap gaps | Running to the edge |
| Corner trap | Arena narrows or walls shift | Pre-position before it closes | Reacting after the walls form |
| Delayed drop | Telegraph then pause | Wait, then move late | Dodging on the first signal |
The Tenna encounter is the best place to practice telegraph reading because the fight escalates in a way that rewards early positioning. According to community videos, Tenna's patterns start with readable wind-ups and then compress into overlapping volleys that punish players who are still reacting to the previous attack. If you can hold the center and move on the telegraph rather than the bullet, the Tenna fight becomes a rhythm check instead of a reflex test. The full DELTARUNE Fight boss strategies discussion in the boss roster guide covers how Tenna fits into the confirmed line-up, but the dodge fundamentals stay the same across every encounter.
Safe-Spot Reads for Tenna, King, and Pink
Each confirmed boss has a safe-spot logic that changes how you should position the soul, and learning those spots is faster than memorizing every bullet pattern. The safe spot is not always a fixed corner; it is often a moving zone that shifts with the boss's phase, so the read has to be dynamic rather than static. Players who treat a safe spot as a permanent hiding place get punished when the boss changes its targeting behavior mid-fight.
Tenna's Pressure Rhythm
Tenna applies pressure through overlapping volleys that force the soul to keep moving while the gaps between bullets shrink. The safe spot during Tenna's early phase is usually just off-center, close enough to reach any edge but far enough to avoid the densest part of the spread. As the fight progresses, the safe spot shifts toward the edges because the center becomes a kill zone, which is the opposite of the general center-hold rule. The community recording posted by Sevv shows this shift clearly: the uploader holds center well early on, then gets clipped repeatedly once the closing phase pushes the safe zone outward.
The key read for Tenna is to watch whether the next volley tracks your current position or covers a fixed area. A tracking volley means you should keep the soul moving in a wide arc, while a fixed-area volley means you should find the gap and hold still. Mixing up those two responses is the most common cause of deaths in the Tenna fight, according to player reports.
King's Tracking Volleys
King punishes reactive movement more than any other confirmed boss because his tracking volleys follow the soul's current position and leave almost no room to correct after the fact. The safe spot against King is always the space you are moving toward, not the space you are currently in, which means the soul has to commit to a direction before the volley resolves. Players who try to dodge King's attacks by waiting and then flicking to the side usually get clipped because the tracking logic anticipates that flick.
The better habit is to move in a smooth, continuous arc that never stops, because a moving soul is harder for the tracking volley to pin down. When King pauses between volleys, that is the window to reset toward the center and re-establish your escape options. The combat guide goes deeper into how movement discipline carries over between bosses, but the core rule for King is simple: never be where the volley expects you to be.
Pink's Mixed Range Pressure
Pink combines close-range swings with long-range spreads, which forces the soul to switch between two completely different dodge rhythms in the same fight. The safe spot against Pink is usually at mid-range, far enough to avoid the swings but close enough to slip through the gaps in the spread before they widen. Players who stay at long range get overwhelmed by the spread, while players who rush in get caught by the swing, so the mid-range zone is the only consistent answer.
The read for Pink is to identify which range the next attack targets before committing to a direction. A swing telegraph means you should back out to mid-range, while a spread telegraph means you should step forward into the gap. Switching between those two responses without panicking is the skill that separates consistent Pink clears from lucky ones, and it is the same skill that carries into the harder difficulty tiers.
Counter Windows and the Rude Buster Skip
Dodging is only half of the survival equation in DELTARUNE Fight; the other half is knowing when to stop dodging and spend TP on a counter. The Rude Buster attack, named in community videos, is the clearest example of a counter window that also functions as a defensive tool, because it can skip part of a boss's final phase if you time it correctly. Players who hold their TP too long end up surviving longer but dealing less damage, which drags the fight into its most dangerous patterns.
| Counter Decision | What It Does | Best Used When |
|---|---|---|
| Early TP spend | Shortens the fight but risks a dry phase | Boss is mid-pattern and vulnerable |
| Late TP spend | Maximizes damage but extends exposure | Boss is winding up a long telegraph |
| Rude Buster skip | Cuts part of the closing phase | Final phase starts with a dense volley |
| No counter | Pure survival, slow but safe | Learning a new pattern family |
The counter window is not the same as the dodge window, and confusing the two is a common mistake. A dodge window is when the soul should be moving to avoid damage, while a counter window is when the soul can afford to stop moving and commit to an attack. According to community videos, the best counter windows open right after a boss finishes a long telegraph, because the boss is briefly locked into recovery and cannot punish the soul for standing still. Learning to recognize that recovery pause is what turns a defensive player into an offensive one.
The Rude Buster skip is especially valuable against Tenna's closing phase, where the bullet density reaches its peak and the soul has almost no room to maneuver. If you can land the Rude Buster at the right moment, the final volley never spawns, and the fight ends before the hardest pattern begins. Players report that this skip is not guaranteed and requires precise timing, but the payoff is large enough that it is worth practicing on Standard before attempting it on Brutal or Genocide.
Building a Dodge Training Loop That Actually Sticks
The fastest way to improve at dodging boss attacks in DELTARUNE Fight is to practice one pattern family at a time instead of grinding full fights and hoping for the best. A training loop that isolates a single response, repeats it until it becomes automatic, and then layers in the next response builds muscle memory much faster than random attempts. The loop below is based on how players report improving their survival time across multiple confirmed bosses.
The Three-Step Isolation Loop
The first step is to pick one boss and one pattern family, then run the fight only far enough to trigger that pattern before resetting. The second step is to practice the correct soul response in isolation, without worrying about damage or TP, until you can execute it without thinking. The third step is to add the next pattern family and practice switching between the two responses, because the real difficulty in DELTARUNE Fight is not any single dodge but the transition between dodges.
| Training Step | Focus | Success Signal |
|---|---|---|
| Isolate one pattern | Single telegraph and response | You move before the bullet spawns |
| Repeat until automatic | Muscle memory for the response | You stop thinking about the input |
| Add a second pattern | Switching between responses | You transition without pausing |
| Full fight attempt | All patterns together | You survive the closing phase |
This loop works because it respects how the soul cursor actually behaves under pressure. When you are learning, the soul moves in jerky, reactive flicks because your brain is processing each bullet individually. After enough isolated repetition, the soul starts moving in smooth, anticipatory arcs because your brain is processing the telegraph instead. That shift from reactive to anticipatory movement is the single biggest improvement you can make, and it only comes from focused repetition rather than raw attempt count.
The Kaizo Knight guide shows how this training loop applies to the hardest confirmed fight, where every pattern family appears in sequence and the margin for error shrinks to almost nothing. Even if you are not ready for Kaizo Knight yet, the same loop works on Tenna, King, and Pink, and it builds the foundation you will need for the harder tiers.
Frequently Asked Questions
How do I stop getting hit during the dense closing phase?
The closing phase punishes edge hugging and reactive flicks, so hold center early and move on the telegraph before the bullets spawn. When the safe zone shifts outward, commit to a continuous arc instead of stopping to assess. Practice the transition between pattern families, because the closing phase is really a test of switching speed.
What is the best way to practice dodging without wasting time?
Isolate one pattern family and run the fight only far enough to trigger it, then reset. Repeat the correct soul response until it becomes automatic, then add a second pattern and practice switching. This loop builds anticipatory movement faster than grinding full fights, according to player reports.
Does the Rude Buster actually skip part of the final phase?
According to community videos, the Rude Buster can skip part of a boss's closing phase if you land it at the right moment, but the timing is precise and not guaranteed. Practice the skip on Standard before attempting it on Brutal or Genocide, and treat it as a bonus rather than a core survival strategy.
Which boss is the best for learning dodge fundamentals?
Tenna is the best starting point because the fight escalates from readable wind-ups into overlapping volleys, which teaches both early positioning and late-phase movement. King is better for practicing continuous arcs against tracking volleys, while Pink forces you to switch between close-range and long-range responses.
Why do I keep getting trapped in corners?
Corner traps happen when you drift toward the edge before the telegraph resolves, which removes half of your escape routes. Hold center until a specific pattern forces you outward, and when you do move to the edge, pre-position before the walls close rather than reacting after they form.