
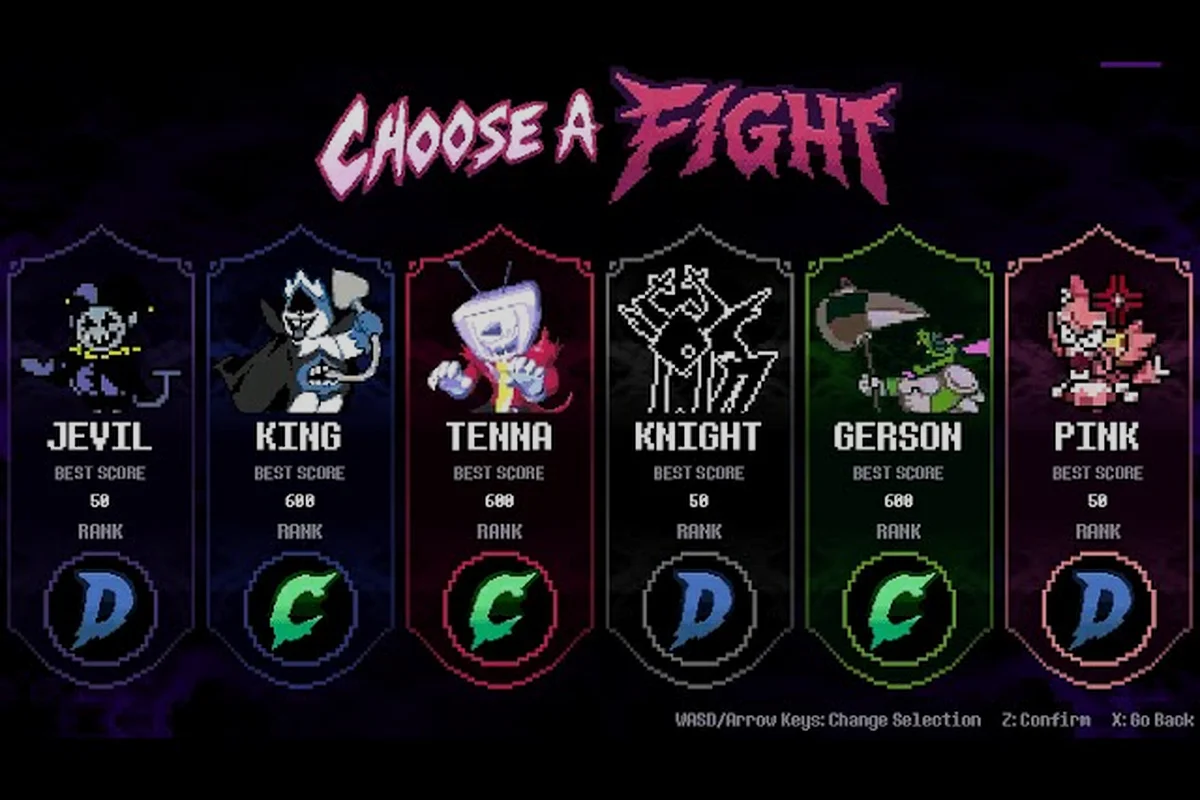
The Kaizo Knight encounter in DELTARUNE Fight represents the community's accepted completion milestone, and learning how to beat kaizo knight without taking a single hit demands a fundamentally different approach than simply outlasting the fight. According to community videos, the strengthened Knight variant punishes aggressive damage output while rewarding players who treat every attack segment as a survival puzzle first. This guide breaks down the solo no-hit timing plan, phase-by-phase attack reads, and the healing windows that actually hold up on Roblox.
Understanding the Kaizo Knight Survival Philosophy
Most players approach the Kaizo Knight the same way they approach the earlier confirmed bosses in the line-up, which is exactly why they struggle. The core insight from community video captures is that long survival phases matter more than damage output in this specific encounter. While Tenna and King reward players who learn their attack patterns and punish greed, the Kaizo Knight reverses the usual priority: staying alive through extended bullet phases is the actual win condition, not racing to the next damage window.
The fight alternates between two distinct modes that players must internalize before attempting a no-hit run. During cursor phases, you steer the Soul through dense bullet patterns where a single mistake ends the attempt. During attack phases, you spend TP on offensive options like Rude Buster to skip dangerous late segments rather than playing them out. According to community videos, spending TP on Rude Buster at the right moment can bypass entire attack sequences that would otherwise force you into nearly impossible dodge timing.
The difficulty tiers compound this challenge. The Kaizo Knight appears across Standard, Brutal, and Genocide difficulty settings, but the no-hit solo plan described here assumes you are practicing on the hardest tier where attack density and safe gaps are most punishing. Players report that the difference between tiers is not a simple health multiplier but rather a qualitative shift in how much safe space exists between bullet waves.
| Survival Element | What the Phase Demands | Habit That Helps |
|---|---|---|
| Cursor movement | Precise micro-adjustments through narrow gaps | Keep your eyes on the Soul, not the incoming bullets |
| TP management | Saving enough for Rude Buster skips | Bank TP during easier early waves |
| Attack reads | Recognizing telegraphs before the bullet wall appears | Practice each phase in isolation on Standard first |
| Healing windows | Finding the only safe moments to recover | Delay healing until the transition between attack segments |
The biggest mistake solo players make is treating the Kaizo Knight like a damage race. Community reports consistently show that players who focus on survival-first positioning clear the encounter more reliably than those who optimize for maximum TP spending. The no-hit approach takes this philosophy to its logical extreme: every input exists to preserve the Soul, and damage happens only when it costs you nothing.
Reading the Kaizo Knight Phase-by-Phase
The Kaizo Knight fight unfolds in a series of escalating attack segments, and according to community videos, each segment telegraphs its patterns well in advance if you know what to look for. The early portion of the fight serves as a warm-up that tests your ability to read wide, high-damage swings that leave predictable safe zones. Players who rush through this section often arrive at the harder phases without having internalized the rhythm.
Early Phase: Wide Swings and Safe Corners
The opening segment of the Kaizo Knight encounter features sweeping attacks that cover large portions of the arena while leaving specific corners relatively safe. According to community videos, the key is recognizing the telegraph animation that precedes each wide swing, because the safe zone shifts depending on which direction the attack originates. Staying near the center of the arena gives you the shortest path to any corner, but it also puts you closer to the origin point of several attacks.
A practical habit that helps here is counting the rhythm of the swings rather than reacting to each one individually. The Kaizo Knight tends to chain attacks in predictable sequences, and once you recognize the pattern, you can pre-position your Soul before the bullet wall even appears. Players report that this early phase is where most no-hit attempts fall apart, not because the patterns are hard, but because players try to react instead of anticipate.
Mid Phase: Dense Bullet Curtains
The middle portion of the fight introduces dense bullet curtains that require much tighter movement through narrow gaps. This is where the survival-first philosophy becomes non-negotiable, because attempting to squeeze in damage during these segments almost always results in a hit. According to community videos, the correct approach is to treat every bullet curtain as a pure survival puzzle with no offensive output whatsoever.
The Soul's hitbox is small enough to thread through gaps that look impossible at first glance, but only if you understand where the safe gaps actually are. Players report that the visual density of the bullet curtains is intentionally intimidating, and that the actual safe paths are wider than they appear. Practicing this phase on Standard difficulty lets you learn the gap positions without the pressure of the harder tiers.
| Phase Segment | Primary Threat | No-Hit Response |
|---|---|---|
| Opening swings | Wide arcs with corner-safe zones | Pre-position based on telegraph direction |
| Bullet curtains | Dense patterns with narrow gaps | Pure survival, zero offensive output |
| Late attack chains | Fast sequences with short windows | Spend TP on Rude Buster to skip |
| Transition moments | Brief pauses between segments | Only safe healing windows |
Late Phase: The Rude Buster Skip
The late portion of the Kaizo Knight fight is where TP management becomes the deciding factor between a clean no-hit run and a frustrating reset. According to community videos, certain late attack segments can be skipped entirely by spending TP on Rude Buster instead of playing them out. This is not a damage optimization trick; it is a survival tool that removes the most dangerous patterns from the fight altogether.
The timing of the Rude Buster skip matters more than the fact that you use it. Players report that spending TP too early leaves you without the resource when the truly dangerous segments arrive, while spending it too late means you have already suffered through the hardest patterns. The sweet spot, according to community video analysis, is saving your TP until the attack chains become so fast that dodging them consistently is no longer realistic.
Solo No-Hit Timing: The Complete Sequence
Executing a solo no-hit run against the Kaizo Knight requires a specific sequence of priorities that changes as the fight progresses. The following breakdown organizes the encounter into decision points where your next action determines whether the run survives or resets. Each decision point builds on the previous one, which means a mistake early in the fight cascades into a much harder situation later.
Decision Point 1: Opening Positioning
The first few seconds of the Kaizo Knight encounter set the tone for everything that follows. Your initial position determines which attack patterns you face first, and according to community videos, starting near the center of the arena gives you the most options for responding to the opening swings. Players who start in a corner often find themselves trapped by the first wide arc with no safe path to escape.
The no-hit approach here is to delay your first movement until you see the telegraph animation. Reacting too early puts you in a position that the attack was designed to punish, while waiting for the telegraph gives you the information you need to choose the correct safe zone. This patience-based opening is counterintuitive for players coming from the earlier bosses, where aggressive movement often works better.
Decision Point 2: TP Banking Discipline
The middle portion of the fight is where TP banking discipline separates successful no-hit runs from failed attempts. Every TP you spend on early damage is TP you do not have for the Rude Buster skip later, and the math is unforgiving. According to community videos, the optimal approach is to bank every point of TP during the early and middle phases, spending nothing until the late attack chains begin.
This discipline is harder than it sounds because the game rewards offensive output visually, and the temptation to spend TP on damage is constant. Players report that the mental shift from "how much damage can I deal" to "how much TP can I preserve" is the single most important change in their approach to the Kaizo Knight. The no-hit run is not about dealing damage efficiently; it is about surviving efficiently.
Decision Point 3: The Skip Window
The skip window arrives when the late attack chains begin, and this is where your TP banking pays off. According to community videos, spending TP on Rude Buster at this point removes the most dangerous segments from the fight, effectively shortening the encounter by skipping the patterns that are hardest to dodge. The timing of this spend is critical: too early and you waste the skip on a manageable segment, too late and you have already taken a hit.
Players report that the skip window is telegraphed by a distinct shift in attack rhythm that signals the transition from dodgeable patterns to nearly impossible ones. Learning to recognize this shift comes from repeated practice on the lower difficulty tiers, where the same rhythm shift occurs but with more forgiving bullet density. Once you can identify the skip window reliably, the no-hit run becomes a matter of execution rather than luck.
| Decision Point | What to Watch For | Correct No-Hit Action |
|---|---|---|
| Opening | First telegraph animation | Delay movement, then choose safe zone |
| Mid-fight | TP meter filling | Bank everything, spend nothing |
| Skip window | Rhythm shift in attack chains | Spend TP on Rude Buster |
| Healing | Transition between segments | Heal only during brief pauses |
Healing Windows That Actually Hold Up
Finding safe healing windows in the Kaizo Knight fight is harder than it sounds, because most of the encounter offers no safe moment to recover. According to community videos, the only reliable healing windows occur during the transition moments between attack segments, when the bullet patterns briefly clear and the next telegraph has not yet appeared. These windows are short, and missing them means carrying damage into the next segment.
The Transition Heal
The transition heal is the core healing technique for solo no-hit attempts, and it requires you to recognize the exact moment when one attack segment ends and the next begins. Players report that these transitions are marked by a brief pause in the bullet patterns, during which the Kaizo Knight is repositioning for the next attack. This pause is your only safe opportunity to recover lost health.
The challenge is that the transition windows are shorter on higher difficulty tiers, which means you need to be already positioned correctly when the pause arrives. If you are still dodging bullets when the transition begins, you will miss the healing window entirely. Practicing the transition timing on Standard difficulty helps you internalize the rhythm so that you can execute it consistently on Brutal and Genocide.
Why Healing Early Is a Trap
Many players try to heal at the first sign of damage, which is almost always a mistake in the Kaizo Knight fight. According to community videos, healing during an active attack segment is effectively impossible because the bullet patterns do not pause long enough for the healing action to complete. Attempting to heal mid-pattern usually results in taking additional damage, which puts you in a worse position than if you had simply continued dodging.
The correct approach is to delay healing until the next transition, even if that means fighting through an entire segment with reduced health. This is uncomfortable for players who are used to healing immediately after taking a hit, but the Kaizo Knight punishes impatience more than any other confirmed boss in the line-up. The no-hit run takes this to the extreme: if you execute perfectly, you never need to heal at all, which means the healing windows are a safety net rather than a core strategy.
How the Kaizo Knight Compares to Other Confirmed Bosses
Understanding how the Kaizo Knight fits into the broader deltarune fight boss order helps contextualize why this encounter demands a different approach. The confirmed line-up so far includes Tenna, King, Pink, and the Kaizo Knight, with each boss testing a different aspect of player skill. According to community videos, the Kaizo Knight is the hardest of the confirmed bosses, but the difficulty comes from survival pressure rather than raw damage output.
The deltarune fight tenna boss fight emphasizes learning specific attack patterns and punishing greed, while the deltarune fight king boss fight tests your ability to manage space and positioning. The deltarune fight pink boss fight introduces faster attack rhythms that require quicker reactions. The Kaizo Knight combines all of these elements and adds the TP management layer that makes the Rude Buster skip so important.
| Confirmed Boss | Primary Skill Tested | How Kaizo Knight Differs |
|---|---|---|
| Tenna | Pattern recognition | Kaizo adds survival-first pressure |
| King | Space management | Kaizo adds denser bullet curtains |
| Pink | Reaction speed | Kaizo adds TP skip decisions |
| Kaizo Knight | Survival endurance | The hardest tier of all confirmed bosses |
Players who have cleared the earlier bosses often assume that the same strategies will carry over to the Kaizo Knight, but community reports suggest otherwise. The deltarune fight boss rush format means you face these encounters in sequence, and the habits you build against Tenna and King can actually work against you when the Kaizo Knight arrives. The patience-based opening and TP banking discipline are specific to this encounter, not general skills that transfer from the earlier fights.
For a broader look at how all the confirmed bosses fit together, the complete boss breakdown covers the full confirmed line-up with phase-by-phase analysis for each encounter. The Kaizo Knight guide here assumes you have already cleared the earlier bosses and are specifically working on the no-hit solo challenge.
Frequently Asked Questions
What makes the Kaizo Knight harder than other confirmed bosses?
The Kaizo Knight combines survival pressure, dense bullet curtains, and TP management into a single encounter, which is why community videos treat beating it as a completion milestone. Unlike Tenna or King, the Kaizo Knight punishes aggressive damage output and rewards players who treat every attack segment as a survival puzzle first.
How does the Rude Buster skip work in the Kaizo Knight fight?
According to community videos, spending TP on Rude Buster during the late attack chains can skip dangerous segments entirely rather than playing them out. The timing matters more than the fact that you use it: save TP through the early and middle phases, then spend it when the attack rhythm shifts to nearly impossible patterns.
Is a solo no-hit run realistic for the Kaizo Knight?
Yes, but only with the survival-first philosophy and TP banking discipline described in this guide. Players report that the no-hit approach is more reliable than damage racing because it removes the most dangerous patterns from the fight through the Rude Buster skip, leaving only the segments you have practiced extensively.
What are the safe healing windows in the Kaizo Knight fight?
The only reliable healing windows occur during transition moments between attack segments, when bullet patterns briefly clear and the next telegraph has not yet appeared. Healing during an active attack segment is effectively impossible, and attempting it usually results in taking additional damage rather than recovering health.
Does the Kaizo Knight appear in the boss rush format?
According to community videos, the Kaizo Knight is part of the confirmed boss line-up that players face in sequence, though the exact order may vary by difficulty tier. The habits you build against earlier bosses do not always transfer, which is why this encounter demands its own dedicated practice routine.