
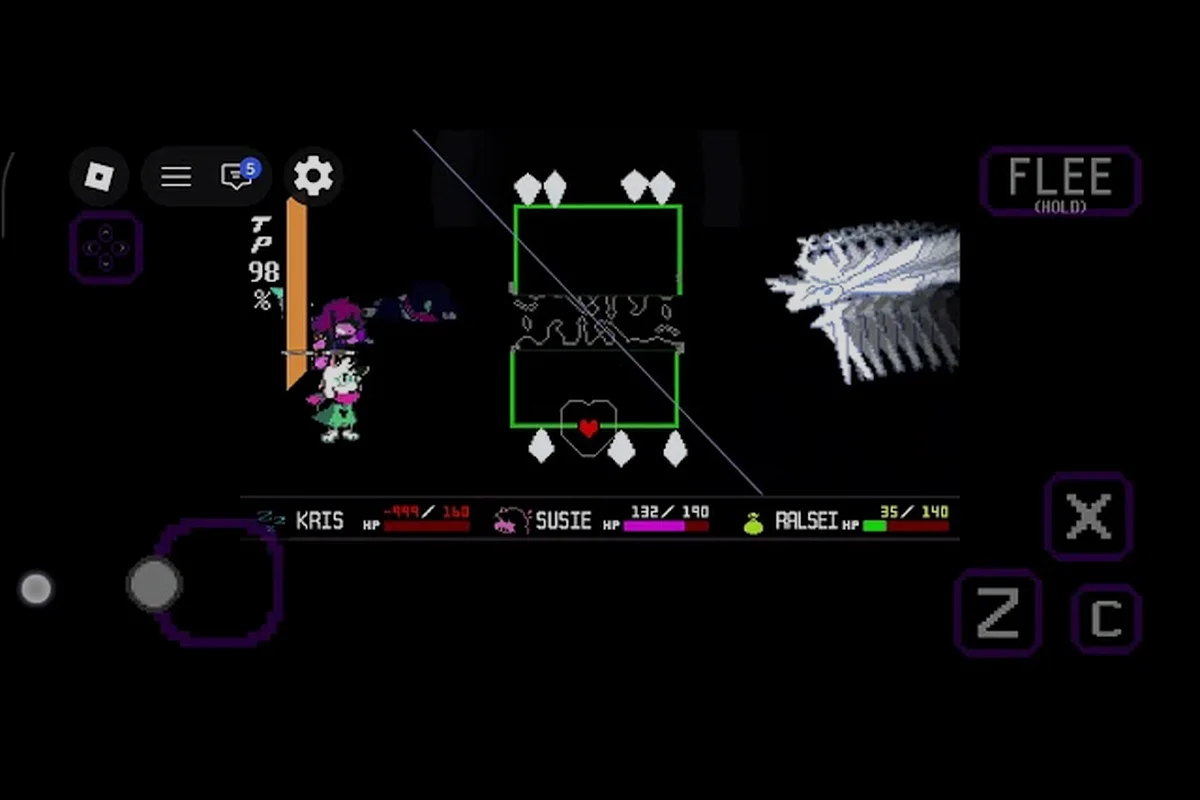
Long survival runs in DELTARUNE Fight demand a completely different skill set than single-boss clears. The endless mode concept pushes your Soul control, TP management, and pattern recognition to the limit across consecutive encounters without a reset. Understanding how to chain fights, preserve resources, and adapt to custom rule sets separates players who clear one boss from those who survive marathon sessions.
What Endless Mode Actually Demands
The core challenge of a deltarune fight endless mode run is not individual boss mastery but sustained consistency. According to community videos, the game's boss rush structure forces you to face the confirmed line-up — Tenna, King, Pink, and Kaizo Knight — back to back, with the hardest tier punishing any lapse in focus. As of the September 2026 build, players report that the transition between encounters leaves little room for recovery, which means every Soul movement and TP expenditure carries forward into the next fight.
The key difference between a standard clear and an endless run is resource discipline. In a single boss attempt, you can spend TP aggressively because the fight ends quickly. In a survival format, that same aggressive spending leaves you empty-handed when Kaizo Knight appears at the end of the rotation. Community reports consistently emphasize that successful marathon players treat every attack as an investment in the next encounter rather than a standalone burst.
| Habit | Single-Boss Mindset | Endless Survival Mindset |
|---|---|---|
| TP usage | Spend freely on Rude Buster | Reserve for high-pressure phases |
| Soul movement | React to current pattern | Anticipate next boss's opener |
| Risk tolerance | Trade hits for damage | Prioritize clean dodges over speed |
| Reset behavior | Restart on early mistakes | Accept partial damage and adapt |
| Mental pacing | Short bursts of focus | Sustained attention across rotation |
The transition moments matter more than most players expect. While a single boss fight rewards memorization, an endless run rewards pattern recognition across encounters. You need to recognize when a boss telegraphs a wide, high-damage swing early enough to reposition your Soul without burning unnecessary movement. Players who survive the full rotation report that the hardest adjustment is unlearning the habit of treating each fight as isolated.
Boss Rush Mode: Chaining the Confirmed Roster
A deltarune fight boss rush mode run follows the confirmed line-up so far, but the exact order and any hidden variations remain unverified outside community observations. What is clear from gameplay footage is that each boss demands a distinct defensive rhythm. Tenna pressures your positioning with screen-coverage patterns, while King tests your ability to read telegraphed heavy swings. Pink, added later according to player reports, introduces timing-based dodges that punish panic movement.
The most dangerous encounter in a rush context is Kaizo Knight, which community videos describe as a modifier-style challenge rather than a standard boss. The Kaizo Knight fight breakdown explains the specific attack patterns, but for endless mode the critical factor is fatigue. By the time you reach this fight, your hands are tired, your TP pool is depleted, and your reaction speed has dropped. Players who practice Kaizo Knight in isolation often fail in rush runs because they underestimate how much the preceding encounters drain their consistency.
Managing TP Across Multiple Fights
TP is the most contested resource in any survival format. The Rude Buster attack, confirmed through community videos, can skip long attack segments, but using it early in the rotation leaves you vulnerable later. The smart approach is to identify which boss phases genuinely require burst damage and which can be cleared with patient dodging.
| Boss | Phase That Justifies TP | Phase to Save TP |
|---|---|---|
| Tenna | Screen-filling pattern overlap | Early single-projectile waves |
| King | Wide, high-damage swing follow-up | Telegraphed wind-up windows |
| Pink | Tight timing sequences | Spacing-based pressure |
| Kaizo Knight | Final stretch after long rotation | Opening positioning checks |
The TP decision tree changes when you add custom rules. A deltarune fight custom difficulty setup that restricts healing or removes recovery windows makes every point of TP more valuable. Players experimenting with self-imposed restrictions report that the hardest adjustment is accepting longer fights in exchange for resource preservation. The instinct to end a fight quickly with Rude Buster is strong, but in a marathon context that instinct is exactly what kills runs.
Reading Fatigue as a Mechanic
Fatigue is not a visible stat, but it functions like one in endless mode. Your reaction time degrades across a long rotation, and bosses that felt manageable in isolation become lethal when your focus wavers. The solution is not to push through fatigue but to build recovery habits into your run structure. Short mental resets between bosses, even just a few seconds of controlled breathing, help maintain the consistency that endless mode demands.
Survival Mode: Building a No-Damage Foundation
A deltarune fight survival mode approach flips the priority from damage output to damage avoidance. The no damage mode concept, while not an official toggle according to available information, is a community-defined challenge where any hit ends the run. Players pursuing this restriction report that it fundamentally changes how they read boss patterns, because every attack becomes a lethal threat rather than a resource trade.
The foundation of a no-damage run is Soul positioning discipline. Your Soul is the heart-shaped cursor you steer during bullet phases, and its movement is the only defensive tool you control directly. The most common mistake in early no-damage attempts is overcorrecting — moving too far in response to a threat and drifting into a second projectile. Community videos show that top players use small, deliberate movements, keeping the Soul close to safe zones rather than darting across the screen.
The No-Damage Decision Framework
When every hit is fatal, your decision-making narrows to a single question: is this position safe for the next half-second? That question repeats hundreds of times per fight, and the answer depends on reading telegraphs early. Bosses in DELTARUNE Fight signal their attacks well in advance, according to community observations, which means the information you need is always on screen before the threat arrives.
| Decision Point | Safe Choice | Risky Choice |
|---|---|---|
| Boss raises arm | Move to opposite quadrant | Stay for damage window |
| Projectile cluster forms | Back off to open space | Thread through gaps |
| TP available | Save for guaranteed opening | Spend on prediction |
| Screen edge pressure | Rotate early | Wait for last moment |
| Post-attack recovery | Reset to neutral position | Chase extra damage |
The deltarune fight no damage mode mindset also changes how you value Rude Buster. In a normal run, the attack is a damage tool. In a no-damage run, it is a phase-skipping tool — using it to cut short a dangerous pattern rather than to maximize damage output. Community reports suggest that the best no-damage players treat Rude Buster as a defensive resource first and an offensive tool second.
Custom Difficulty: Designing Your Own Gauntlet
The deltarune fight custom difficulty concept is where endless mode becomes truly personal. The game's confirmed difficulty tier names — Standard, Brutal, and Genocide — provide a baseline, but players report building their own rule sets on top of these tiers. The most common custom restrictions include limiting TP usage, banning certain attacks, or imposing a deltarune fight permadeath rule where a single death ends the entire session.
Custom difficulty works best when the rules create interesting decisions rather than pure frustration. A permadeath rule on Standard difficulty tests consistency without demanding perfection, while the same rule on Genocide becomes a test of near-flawless execution. The difficulty modes overview breaks down the baseline tiers, but the real depth comes from layering your own restrictions on top.
Building a Permadeath Ruleset
A deltarune fight permadeath run requires you to define what counts as a run-ending failure. The strictest interpretation is any hit ends the attempt, which merges permadeath with the no-damage challenge. A more forgiving version allows hits but resets the entire boss rotation on death, forcing you to restart from Tenna rather than from the boss you died on.
| Permadeath Variant | Failure Condition | Skill Tested |
|---|---|---|
| Full no-hit | Any damage taken | Perfect pattern execution |
| Rotation reset | Death at any boss | Consistency across full roster |
| TP starvation | Running out of TP | Resource management |
| Time pressure | Boss enrage or timeout | Speed without recklessness |
| Single-boss lock | Death on target boss | Focused mastery |
The value of a permadeath rule is that it forces you to respect every encounter equally. In a normal run, dying to King is a minor setback because you respawn and retry. In a permadeath run, that same death means starting the entire rotation over, which changes how you approach even the easiest phases. Players report that this pressure actually improves their fundamentals, because sloppy habits that were previously forgiven become run-ending mistakes.
Custom Rules That Actually Improve Play
Not all custom restrictions are equally valuable. The best rules target specific weaknesses rather than adding arbitrary difficulty. If you struggle with TP management, a rule that bans Rude Buster entirely forces you to learn every dodge pattern. If you panic during Pink's timing sequences, a rule that requires you to stay in the danger zone longer builds comfort under pressure.
The brutal vs genocide comparison explains how the hardest tiers differ, but custom rules let you target your specific gaps. A player who clears Brutal consistently but dies to Kaizo Knight in rush runs might impose a rule that requires saving full TP for the final fight. That single restriction creates a training environment that directly addresses the weakness.
The Endless Rotation: Practical Survival Framework
Surviving a full endless rotation requires a structured approach rather than raw reflexes. The framework that emerges from community reports has three layers: pre-rotation preparation, in-run resource discipline, and post-fight recovery. Each layer addresses a different failure mode that ends marathon attempts.
Pre-Rotation Preparation
Before starting an endless run, you need to know exactly what you are committing to. The confirmed boss line-up as of the September 2026 build includes Tenna, King, Pink, and Kaizo Knight, but the exact order and any variations should be confirmed through your own observation. According to community videos, the Kaizo Knight modifier footage shows how dramatically the final encounter changes the run's difficulty curve, so knowing when it appears in your rotation matters for TP planning.
Preparation also means setting your custom rules before the run starts, not adjusting them mid-attempt. A deltarune fight custom difficulty setup that changes halfway through teaches you nothing, because the failure data is contaminated by inconsistent conditions. Lock your rules, note them down, and treat every run under those rules as a single data point in a larger learning process.
In-Run Resource Discipline
The middle of an endless run is where most attempts collapse. The pattern is consistent across player reports: early fights go smoothly, TP gets spent on comfortable damage windows, and then the later bosses arrive with an empty resource pool. The fix is to treat TP as a survival currency rather than a damage currency. Every point spent on Rude Buster is a point unavailable for a future emergency.
| Run Phase | Primary Threat | Resource Priority |
|---|---|---|
| Opening boss | Overconfidence | Build rhythm, save TP |
| Middle rotation | Pattern overlap | Spend only on dangerous phases |
| Final boss | Fatigue + depletion | Use saved TP aggressively |
| Transition windows | Loss of focus | Mental reset, not resource spend |
The deltarune fight survival mode mindset applies even when you are not running a no-damage challenge. Survival means finishing the rotation, not finishing it fast. Players who internalize this distinction report that their clear rates improve dramatically, even though their individual fight times increase.
Post-Fight Recovery
The moments between bosses are not downtime — they are active recovery windows. Your hands need to reset, your eyes need to refocus, and your mental model needs to shift from the boss you just beat to the boss coming next. Community reports suggest that players who rush through these transitions make more mistakes in the following fight than players who take a deliberate pause.
Advanced Endless Strategies: Beyond Basic Survival
Once you can consistently clear a standard endless rotation, the next layer of depth comes from optimizing your approach. The deltarune fight boss rush mode format rewards players who can identify which phases are worth engaging and which are worth skipping. Rude Buster is the primary skip tool, but using it optimally requires knowing exactly which attack segments are the most dangerous.
The all boss fights overview provides context on each encounter's structure, but endless mode adds a layer of sequencing that single-fight guides cannot capture. The order in which you face bosses changes your TP calculus, because saving resources for a boss that never appears is as wasteful as spending resources on a boss you could have dodged.
The Jevil Question
According to community videos, a Jevil encounter exists in some form, but its status is not officially confirmed and it does not appear in the standard boss rotation. If you encounter Jevil during a custom endless run, treat it as an extra challenge rather than a core part of the gauntlet. The community treats the fight as reported rather than verified, so building your strategy around it would be premature.
Sequencing Awareness
The most underrated skill in endless mode is knowing what comes next. If you know Kaizo Knight is the final encounter, you can plan your entire TP budget around that fight. If the order is randomized or varies by run, you need a more flexible approach that maintains a reserve for any high-pressure phase. Players who track their rotations across multiple attempts report that pattern recognition at the sequence level is just as important as pattern recognition at the attack level.
Frequently Asked Questions
What is the best way to practice for endless mode?
Start by clearing each confirmed boss individually on your target difficulty, then chain two bosses together before attempting the full rotation. This builds the specific endurance and resource discipline that endless mode demands without overwhelming you with a full marathon attempt on your first try.
Does DELTARUNE Fight have an official endless mode toggle?
As of the September 2026 build, no official endless mode toggle is confirmed. The endless format described here is a community-defined challenge built on the game's boss rush structure, with custom rules like permadeath and no-damage restrictions layered on top by individual players.
How should I manage TP during a long boss rush?
Treat TP as a survival resource rather than a damage tool. Save it for high-pressure phases and use Rude Buster primarily to skip dangerous attack segments. Spending TP early in the rotation leaves you vulnerable when Kaizo Knight appears at the end.
Is Jevil part of the endless mode rotation?
According to community videos, a Jevil encounter exists but is not part of the confirmed boss rotation. The community treats the fight as an extra encounter rather than a core endless mode component, so do not build your survival strategy around it until its status is officially confirmed.
What custom difficulty rules are best for improving at no-damage runs?
Start with a permadeath rule on Standard difficulty to build consistency, then add a no-hit condition once you can clear the rotation reliably. The progression from permadeath to no-damage creates a natural difficulty curve that targets your specific weaknesses without overwhelming you.